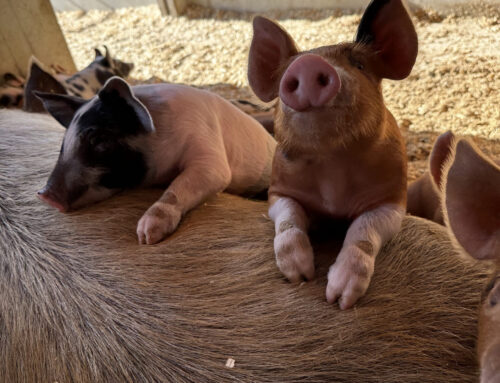
News from the Farm

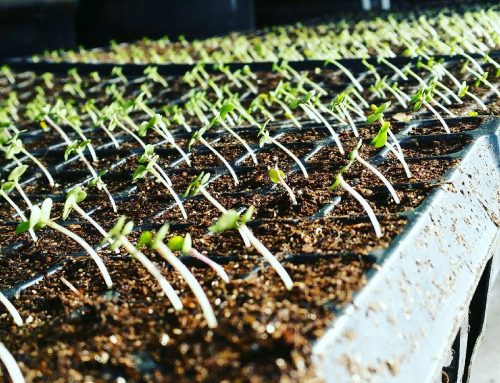
You know when you are watching the pot on the stove waiting for it to boil? (We all do it, even when we know we shouldn’t!) And it starts to form bubbles on the bottom and then begins to vibrate right before it blows up into a full on boil? Well that is a bit what the farm is feeling like right now.

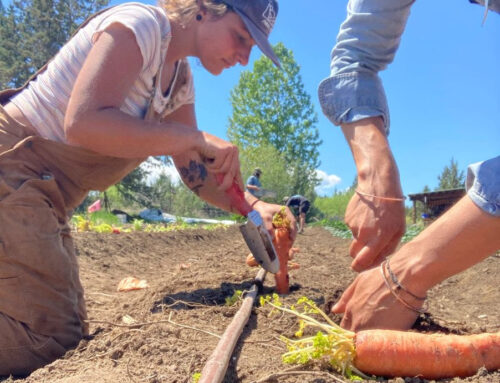
Over the past month we have been doing a lot of bed flipping in preparation for the upcoming weeks of planting. So far, we have only been working in the hoop houses, but starting in the 2-acre garden is right around the corner. (The bubbles are forming on the bottom of the pan.)

photo credit: Nat Leder & Alison Holland
Early this week we got to spend a little time cleaning up after the big winds before that cold front. The winds had blown down an entire fence line in our pig pasture. Luckily, they were still snoozing in their hay den so we got it fixed before it got too wild and they started exploring. Our 4-season is starting to fill up. The trays of allium starts, those long green spindly guys, each hold about 1000 future onion plants. And our pea starts are already about 6″ tall. We are hoping to get them in the ground next week before they start climbing into each other.
We are continuing to start and nurture the plant baby’s that will be harvest throughout the growing season. Our first successions of green onions, kale, and lettuce (started in January) will be planted in the hoops this week and hopefully be ready for the May Winter CSA. The peas, a crop that will start producing in May and be done by the end of June, have been started and are waiting to go into their hoop house home next week. All the alliums for the season were started at the beginning of February and are almost ready for their first hair cuts (this keeps them from growing together in a tangled mess). Our allium crop won’t be harvested until September and October. And later this week we are starting our first round of sweet peppers and our first 2-acre garden successions. (The pot quivers.)

But keeping us from hitting the actual boiling point is both the temperature outside, the lack of daylight (however, a brief moment to revel in the fact that we are at 11 hours of daylight right now!), and the fact that we are still deep in the storage crop season. We also spend a fair amount of our time right now checking on and sorting vegetables. In a rotation of sorts (sometimes skewed by a noticed issue), we go through all of our storage crops (carrots, potatoes, onions, garlic, winter squash, all of them) and pull them out, sort away the things that aren’t storing well, and then repackage. This definitely takes some time, but helps with the longevity of all our storage crops. If just one carrot starts to rot in a bag, it can set the whole bag to rot very quickly. This minding prevents us losing whole bags or crates so we can all enjoy them that much longer. 

The days are getting longer, the 4-season greenhouse is filling up, and coming right up our hoops will begin to be marching lines of transplanted spring vegetables. The pot is certainly beginning to quiver and shake.

What is bed flipping?

Be flipping is the act of removing a current crop from it’s bed and preparing the bed for it’s next crop. This means that for each bed we are going to transplant with all those spring starts we:
  1. Weed and trim the kale plants that are currently planted down to their base leaving the roots in the ground. (We are experimenting with leaving the roots in the beds this year in order to keep feeding microbes that live in the soil as well as adding more biomass to our soil.)
  2. Reform the bed by shoveling the bed back into an approximate 1′ tall x 2-3′ wide mounds.
  3. Spread soil amendments–chicken manure, gypsum, and compost–onto the newly mounded bed. This feeds the soil microbes as well as the plants that will be transplanted within the next month. The plants pull from the minerals and nutrients in the amendments (all organic) which is part of what makes our vegetables so nutrient dense. 
  4. Mix the soil and the amendments with a broadfork (a wide tall pitchfork like object that you step down on and wiggle back and forth to spread the amendments throughout the soil column).
  5. Flatten the surface of the bed with the back of a rake, something we call zenning the bed, and set out your irrigation hoses.
We do this for each bed in our two acre (about 80) and our hoop houses (45 bed) 2-3 times per year. Whew!
photo credit: Alison Holland

These are pics from a couple winters ago, but here you can see Christine mounding the beds and Noah zenning the top. Try as I might, I couldn’t find a picture of us broadforking, probably because we are always working right then. 🙄

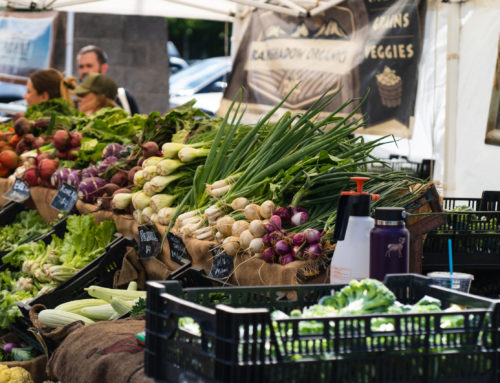
Summer CSA shares still available

It’s that time of year! As you begin to dream about fresh spring & summer vegetables (snap peas, tomatoes, beans, broccoli, even zucchini), don’t forget to secure your Rainshadow Organics 20-week summer CSA. Choose the size and share type that best fits your home. We have sold out for the past 4 years and we are currently about half full. We would hate for our community members to miss their opportunity. 

Probable Box Contents

We pack the vegetable portion of your CSA share on Wednesday before pick up. Our decisions about what goes into the monthly vegetable CSA depends on the temperature and and how our storage crops and the hoops are doing.

Today, we think Thursday’s Vegetable Share will include:

We feel pretty confident about these:
Potatoes
Carrots
Napa Cabbage
Kale
Delicata Squash

We will know more on Wednesday about these:
beets
onions
garlic
green onions
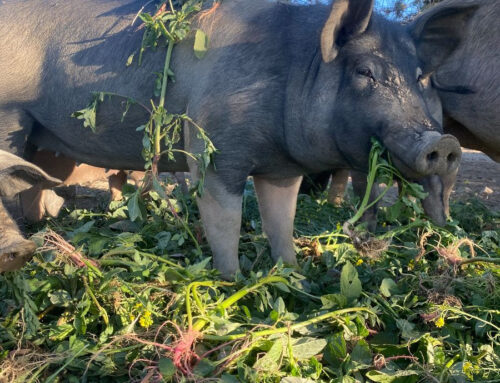
The Meat CSA will include:
PORK! 
This is the month of miscellaneous pork. Your share will include something smoke (bacon, ham steak, ham hock, ham roast), something ground (ground pork, sweet Italian sausage, hot Italian sausage), and then all the rest of the cuts of the hog will be split out between all the shares (chops, roasts, ribs, etc.). A true variety pack!

Recipe Corner

Here are a selection of curated recipes using your box ingredients. Have a question about a recipe? Want to suggest one? Wish you knew how to cook a particular thing better? Ask us HERE and we will see what we can find. If you suggest a recipe, we will probably share it with others in the CSA!

Carrot Slaw 
(Adapted from Karolina Tracz’s recipe in Bounty from the Box by Mi Ae Lipe)

With the longer days (and until a couple days ago warming temps) I am starting to feel the pull towards raw salads again. This one is sure to let the carrots speak for themselves!
 

INGREDIENTS

handful carrots, shredded
1-2 tablespoon fresh lemon juice
1⁄4 teaspoon kosher salt
1⁄4 teaspoon freshly ground white pepper

INSTRUCTIONS

  1. Thoroughly combine all of the ingredients, and place the slaw in the refrigerator for at least 1⁄2 hour to let the flavors blend. You can also make this slaw the night before. Adjust seasonings after that 1/2 hour sit time!
 
Stuffed Squash
(Adapted from Featherstone Farms’ recipe in Bounty from the Box by Mi Ae Lipe)
While the original recipe doesn’t call for it, adding one of your packs of ground pork to this will be DELICIOUS!
 

INGREDIENTS
2 delicata or thelma sanders squash, halved and seeded
4 tablespoons butter or olive oil
1 cup chopped onion
2 ribs celery, chopped
1⁄2 cup walnuts
1⁄2 cup sunflower seeds
2 large cloves garlic, minced
2 teaspoons fresh sage, or 1 teaspoon dried sage
2 teaspoons fresh thyme, or 1 teaspoon dried thyme
2 teaspoons fresh marjoram, or 1 teaspoon dried marjoram 2 cups coarsely crumbled whole wheat bread
Juice of 1 lemon or orange
Salt and freshly ground black pepper
1⁄2 cup raisins or dried cranberries
1 cup grated Cheddar cheese (or swiss or parmesan or really whatever cheese you want)

INSTRUCTIONS

  1. Preheat the oven to 375°F.
  2. Oil a baking dish that can snugly fit the squash halves. Place the squash, flesh side down, in the dish and pour in 2 cups of water. Bake until it is fork-tender, about 20 minutes. (If you are using delicata, this might take less time, so check at 10 minutes.)
  3. Meanwhile, heat the butter or oil in a frying pan and sauté the onions until they turn translucent. Add the celery, walnuts, sunflower seeds, and garlic. Cook over low heat until the nuts are browned. Add the sage, thyme, and marjoram. Stir in the breadcrumbs, lemon juice, salt, pepper, and raisins; then cook over low heat for 5 to 8 minutes. Remove from the pan and stir in the cheese.
  4. Lower the oven temperature to 350°F. Pack the stuffing into the squash cavities and cover with aluminum foil. Bake, flesh side up, for 25 minutes. Then uncover and cook for 5 to 8 minutes longer to brown.
 
Melting Napa Cabbage recipe
Adapted from California Grown
(this served with some fresh bread to sop up the juices, or rice, and a pan friend pork chop on the side sounds incredible)
 

INGREDIENTS
1 head Napa Cabbage
1/3 cup concentrated tomato paste
4 garlic cloves sliced very thin or grated
1 1/2 teaspoons ground coriander
1 1/2 teaspoons ground cumin
1/2 teaspoon ground turmeric
1/2 teaspoon crushed red pepper flakes
1/2 teaspoon coarsely ground black pepper
1/2 cup extra-virgin olive oil divided
1/2 tablespoon coarse Kosher salt divided
3 tablespoons cilantro leaves for serving
 
INSTRUCTIONS

  1. Preheat the oven to 350°F (190°C).
  2. Cut the Napa cabbage in half through the core then cut each half into quarters. You will have 8 Napa cabbage wedges. Set aside.
  3. In a small bowl combine the tomato paste, garlic, coriander, cumin, turmeric, and black pepper. Stir to combine completely. Set aside.
  4. Heat 1/4 cup of the olive oil in a large cast-iron skillet over medium-high heat. Working in batches, if necessary, add as many cabbage wedges into the skillet cut side down as will comfortably fit. Season with the coarse kosher salt. Cook, turning once, until lightly charred, about 2-3 minutes per side. Transfer the seared cabbage to a plate and repeat with any remaining cabbage quarters.
  5. Carefully, wipe out the skillet and reduce the heat to medium. Add the remaining 1/4 cup olive oil to the skillet, once warm and beginning to shimmer add the spiced tomato paste mixture. Heat, stirring constantly, until the tomato paste begins to split and darken in color, 2-3 minutes.
  6. Add enough water to the skillet to come halfway up the sides, about 1 – 1 1/2 cups total. Season the liquid with salt and bring to a simmer.
  7. Nestle all of the seared cabbage wedges into the simmering tomato broth, overlapping if necessary. Transfer the cabbage to the oven and bake, uncovered, turning the cabbage wedges once about half way through, about 40-50 minutes. The cabbage should be falling apart tender when cooked completely.
  8. Serve immediately garnished with cilantro leaves and pistachio crumble if using.
Photo Credit: Nat Leder
We are starting to halter train our newest weaned milk cow, Dulce. She is cute as heck, but still a little unsure of the halter. We spend a lot of time right after our milk cows are weaned getting them comfortable with us and halters so that when they join the milk cow herd in another 2 years it is an easy reintroduction to their daily jaunt to the milk stanchion. 
 
We can’t wait to see you on Thursday, March 2 in Bend or Sisters, or at the Farm Store on Friday or Saturday, March 3 & 4. Please let us know if you have any questions. 

The Farm Crew